> For the complete documentation index, see [llms.txt](https://userguide.dcentwallet.com/llms.txt). Markdown versions of documentation pages are available by appending `.md` to page URLs; this page is available as [Markdown](https://userguide.dcentwallet.com/external-service/connect-with-blade-wallet-extension-including-hbar-native-staking.md).
# Connect with Blade wallet extension (including HBAR native staking)
This is a comprehensive guide to using a user-friendly Blade Wallet together with the D'CENT Biometric Hardware Wallet. When connected, Blade Wallet provides the user interface to accessing the Hedera ecosystem while D'CENT Biometric wallet offers the highest protection of your private keys by securing it offline.
## Requirements
**1. Blade Wallet Chrome extension**
As we are collaborating with Blade Wallet, you will be managing your assets through Blade extension dashboard and interfaces.
For this, you can go on Blade[ website](https://www.bladewallet.io/) and hit the “Connect Blade Wallet button”. You will be redirected to the chrome web store page of the official Blade Wallet Extension and will be able to install it from here.
**2. Have a D’CENT Biometric Wallet**
As of now the integration of Blade Wallet and D’CENT only works with our D’CENT Biometric Wallet, therefore if you do not have one yet, you need to get one here:
{% embed url="" %}
**3. Install Bridge app**
D’CENT Bridge is a software developed by D’CENT in order to connect your Biometric Wallet to your computer and make some actions such as updates or connecting your D’CENT Biometric Wallet with Blade.
If you do not have it installed yet or want to know more about it, we coerce you into reading that guide.
## Connecting D’CENT Wallet with Blade Wallet
You now have completed all the above actions. Blade Wallet Extension is properly installed as well as the D’CENT Bridge.
Do not forget to have your D’CENT usb cable around in order to connect your D’CENT Biometric Wallet to your computer. It will soon be necessary.
### From D’CENT Biometric Wallet
1\. Creating HBAR account
If you are not yet familiar with our product and don’t know how to do so, please consult our tutorial here
2\. Connect your D’CENT Biometric Wallet to your computer using the USB cable that comes with it
### From the Blade Wallet extension
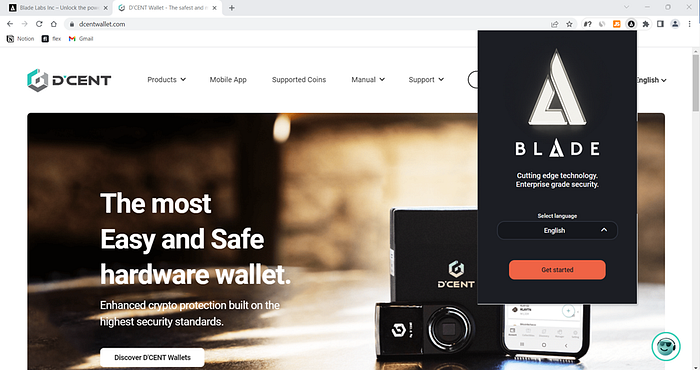
1\. Click on the Blade Wallet extension on your browser
2\. Start the setup by choosing the language of your choice
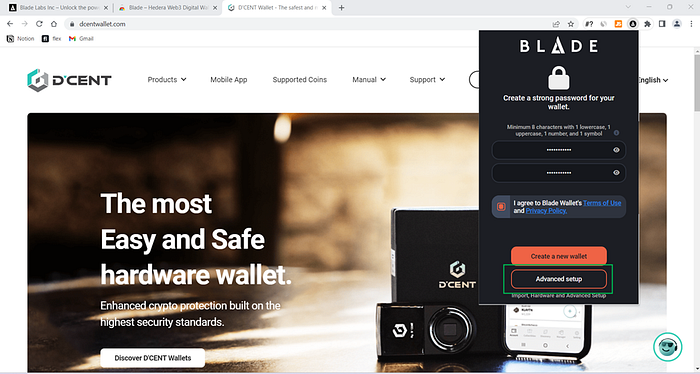
3\. You will need to create a password. For safety reasons, do not use passwords used on other platforms, make it at least 8 characters including uppercase, numbers and symbols. Once done, click on “Advanced setup”
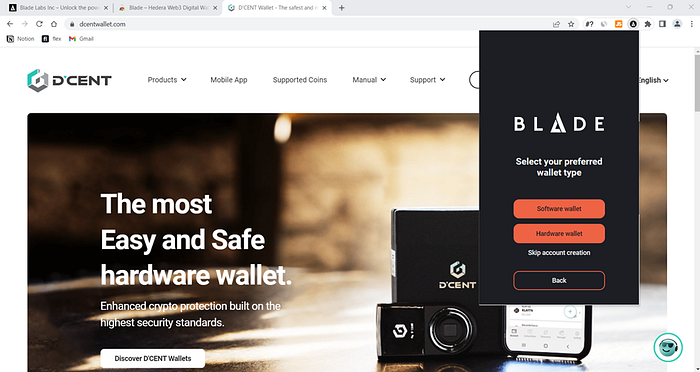
4\. As you will connect to your D’CENT Biometric Wallet, you want to click on ‘Hardware wallet’
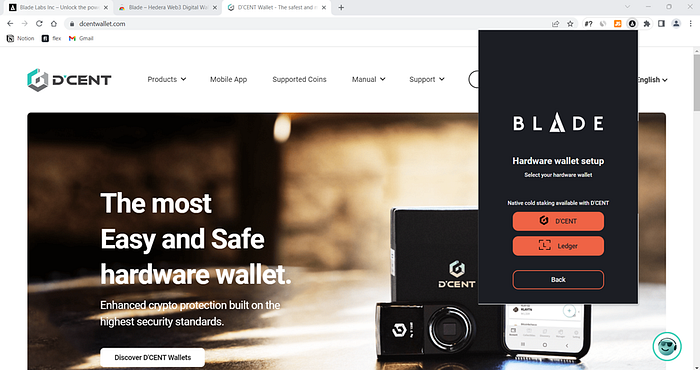
5\. Click on D’CENT Biometric Wallet
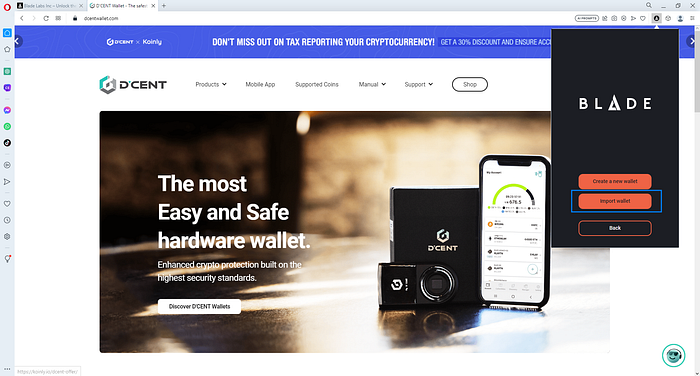
6\. Here, you need to click on ‘Import a wallet’
7\. A new tab should open. It will ask you to plug your D’CENT Biometric Wallet to your computer. Click on ‘Next’
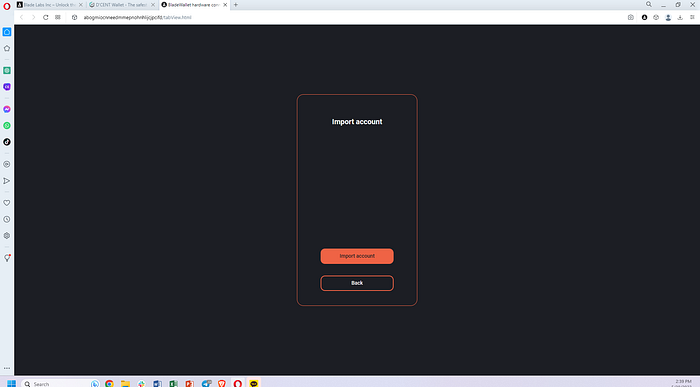
8\. After a short wait, you shall be able to click on ‘import account’
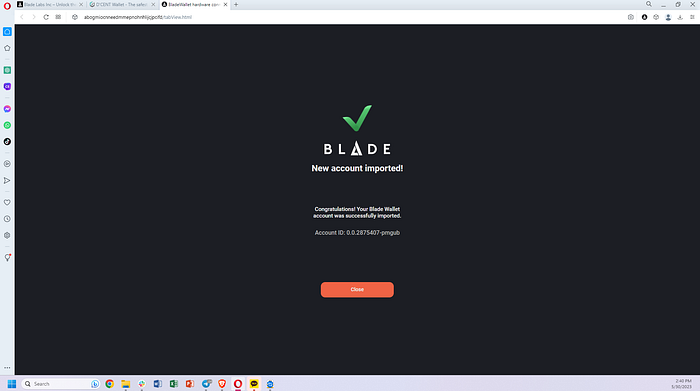
9\. Well done! You now can click ‘Close’. The tab will be closed as well
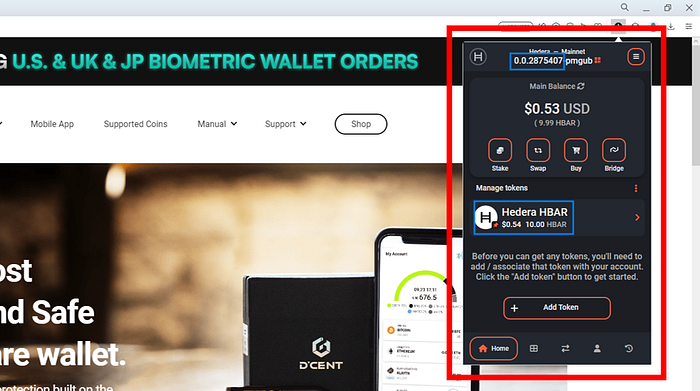
10\. You can open the Blade Wallet extension and you will be able to see your HBAR account imported from the D’CENT Biometric Wallet . On our side, we had some assets already, so we can easily double check if the amount is correct, as well as the public address.
## How to do native staking of HBAR via D’CENT Wallet?
Staking is the process of locking up HBAR in order to participate in the Hedera network consensus. By staking HBAR, users can earn rewards and help to secure the network.
For this, there are some requirements:
* Your D’CENT Wallet must be plugged to your computer
* You must already a HBAR account on your D’CENT Wallet linked to Blade the way explained above
* You must have assets on your account to begin staking
Before starting the process, it is important to note that you will be staking your entire account, you can not stake just part of it. If you want to stake only a part of your assets, you will need to create a second account and split your HBAR into two according to how much you would like to stake.
There is no minimum amount of HBAR to start staking. Staking is made by a period of 24 hours from midnight. While your HBAR asset is being staked, you cannot transfer them until you unstake them.
Get to know more about HBAR Staking via the official article:
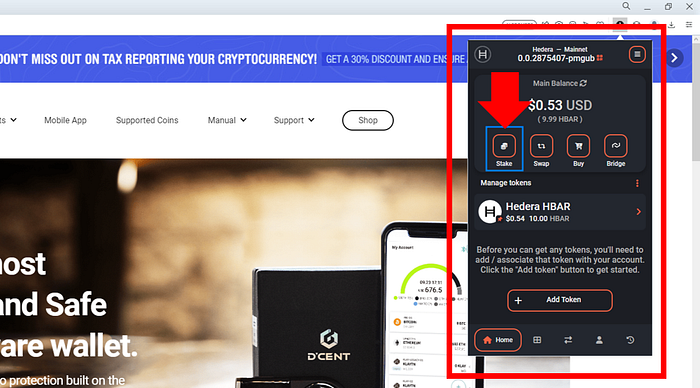
1\. Let’s open the Blade app. As you can see, there is a ‘Stake’ button
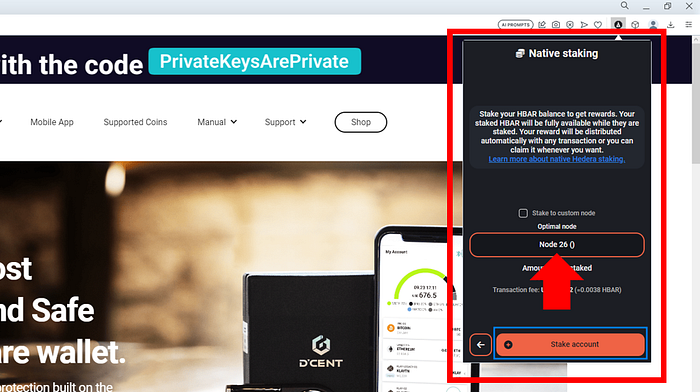
2\. Click on it, then you will be able to choose the node you would like to stake in or just go with the default proposal. We are not recommending one option over the other to you as it is a personal choice.
3\. Click on ‘Sign’
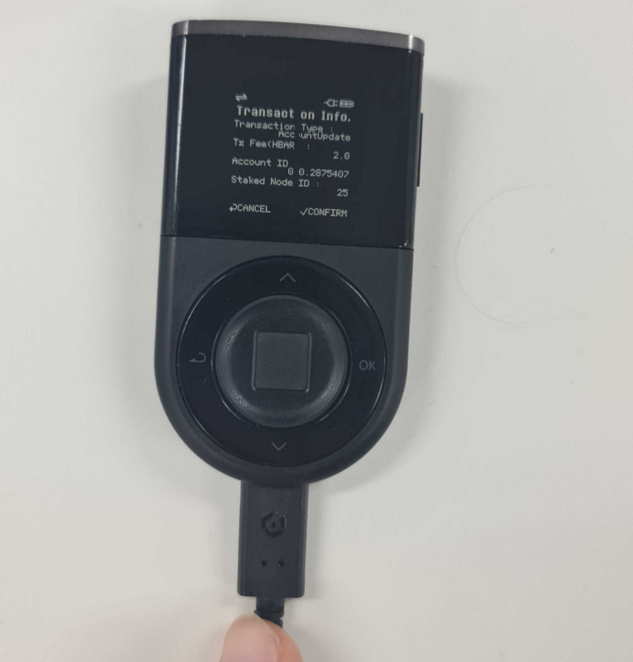
4\. Details are shown on your Biometric Wallet for final approval. Click on ‘OK’ button then you will be able to authenticate yourself via your fingerprint.
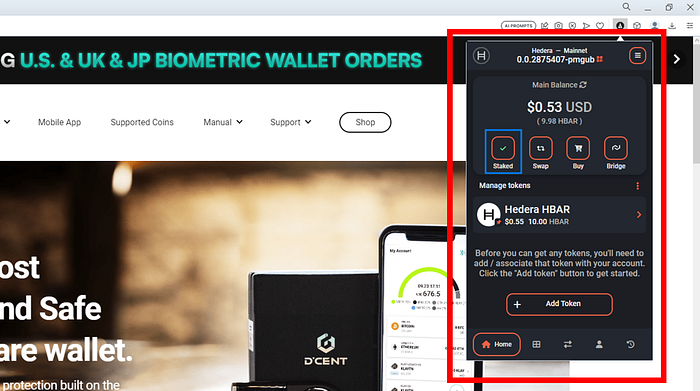
5\. Transaction is complete, you can verify that indeed your tokens are being staked.
{% embed url="" %}