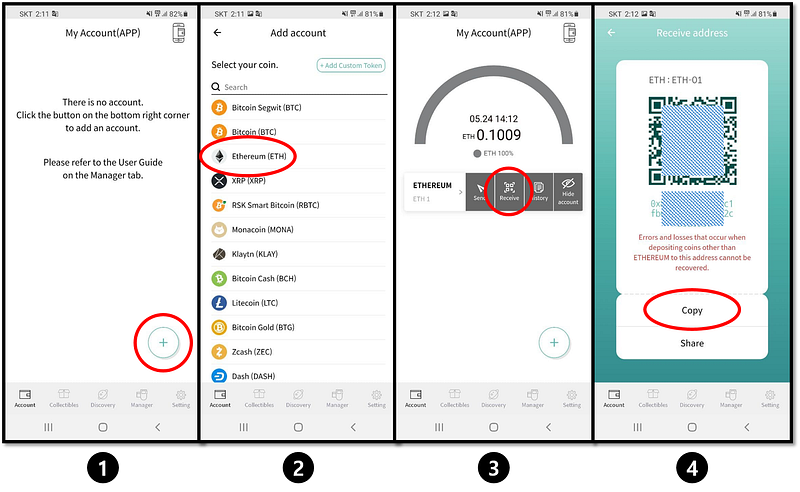
① メイン画面から「+」をタップし、イーサリアム用のアカウントを作成します。
② 追加したいイーサリアム用アカウントを選択します。
③ メイン画面上で作成した、イーサリアム用アカウントのアドレスを確認します(受け取りボタン)。
④ イーサリアム側のアドレスをコピーして自分のイーサリアム用アカウント側から ERC20の暗号資産を受け取ります。
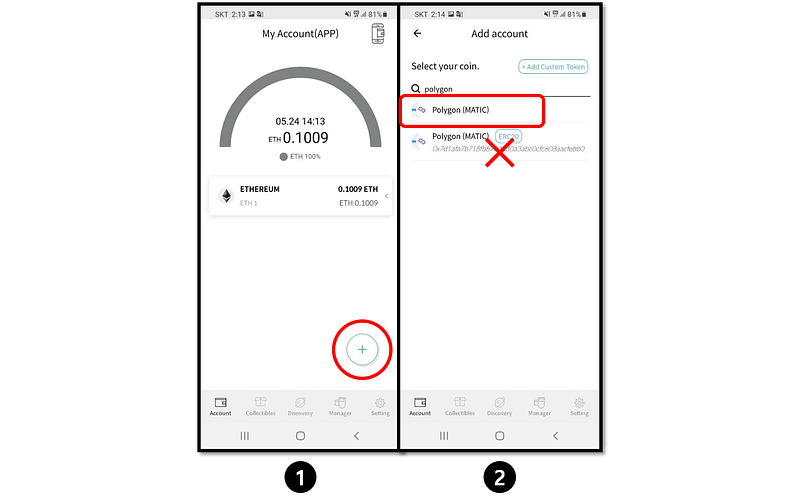
[手順2] ポリゴン(メインネットワーク)アカウントの作成方法
① メイン画面の、「+」をタップしてポリゴン(メインネット)用のアカウントを追加します。
② [Polygon」と検索し、検索結果の中から[Polygon (MATIC)」を選択します。
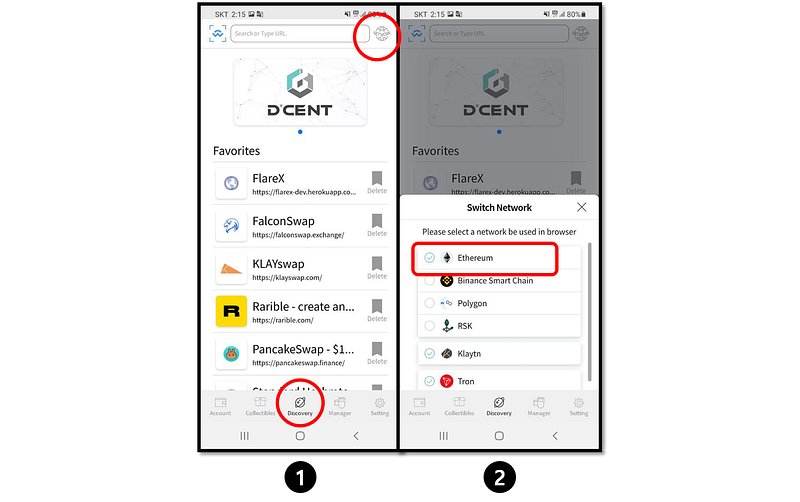
[手順3] DAppsブラウザのネットワークを「イーサリアム」に変更します。
① 「Discovery」タブ画面右上の、[Network]アイコンをタップします。
② ネットワーク設定を「Ethereum」に変更します。
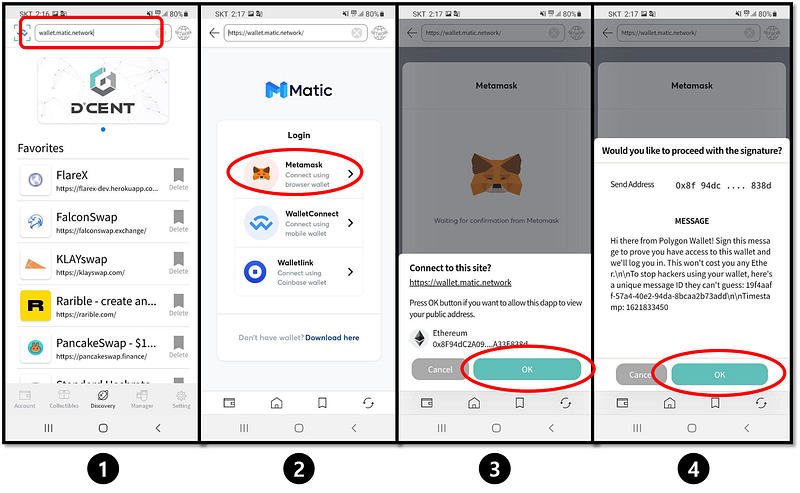
[手順4] ポリゴンのブリッジサイトへの移動およびログイン方法
① 「Discovery」タブ上から、下記のポリゴンブリッジのサイトURLを入力します。
https://wallet.matic.network② ログインの際、使用するウォレットを「Metamask」に指定します。
③ 「OK」をタップしてログインします。
④ ウォレット側で指紋、またはパスコードを入力して本人認証を行います。
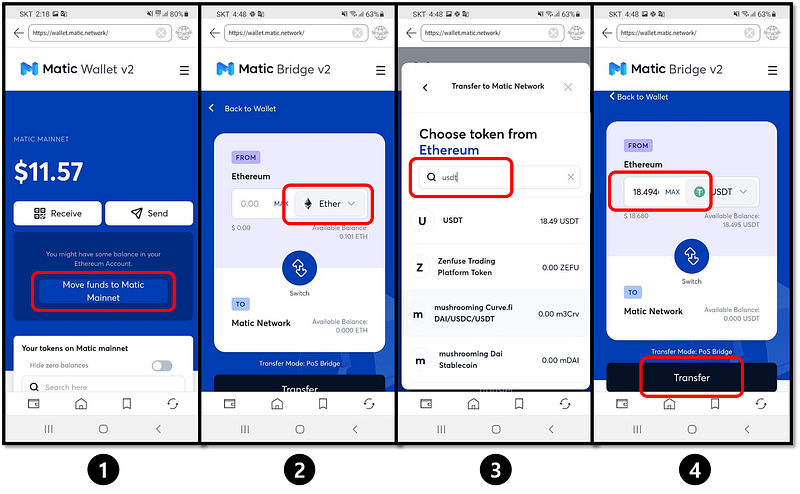
[手順5] 暗号資産移動のリクエスト方法
① 「Move funds to Matic Mainnet」をタップします。
② 移動させたい暗号資産の選択するには、「Ether」で表示されているものをタップします。
③ 「暗号資産」と検索します(例:USDT)。
④ 移動させたい暗号資産の数を設定した後、「Transfer」をタップします。
① 取引に対する承認を行うため、「OK」をタップし、ウォレット上から本人認証(指紋認証、またはパスコードの入力による)
② 取引がリクエストされ、ステータスが完了になるまで待機します。
③ 最後に「Continue」をタップして取引完了となります。
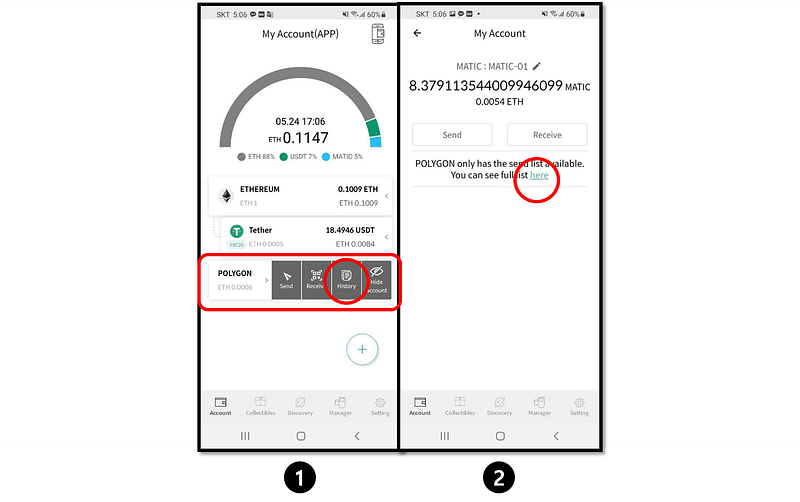
[手順7] ポリゴンのメインネットへ移動された暗号資産の確認方法
① ポリゴン(メインネット)のアカウント上から、「History」をタップします。
② 取引の内容は、取引詳細画面上の「here」をタップします
③ 移動先のサイト上から、「トークンリスト」を確認します。
④ リストの中から「USDT」をタップします。
⑤ コントラクトのアドレスをコピーします。
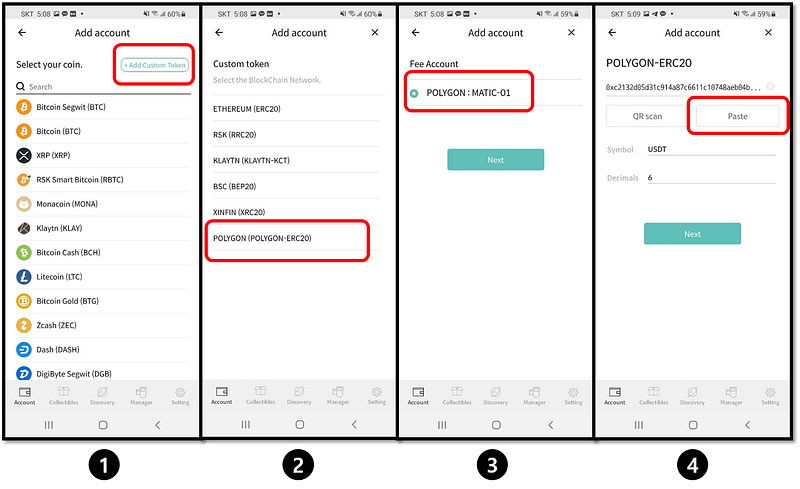
[手順8] D'CENT ウォレットを使ったカスタム型トークン用のアカウント追加方法
① D'CENT ウォレット上から、「Add Custom Token」をタップします。
② ご希望のトークンがサービス完了となっている、ネットワーク(POLYGON-ERC20)をタップします。
③ トークンのアカウントに紐づく手数料が発生する、アカウント(POLYGON)を選択します。
④ ↑[STEP-7]でクリップボードにコピーしたコントラクトアドレスをペーストし、
「次へ」をタップすることでPOLYGON向けのUSDTトークンが発行されます。